Base Muffin Batter

There's something about the smell of a muffin cooking in the oven that just says home. With this easy to make muffin base, no mix ever, you can be creative with the mix-ins to suit your pantry, or tastes. Nothing fancy, just wholesome, fresh ingredients. Get the pot of coffee on because you'll be amazed how fast these come together. I recently went berry picking at my sisters house and decided to base my mix-ins on my picking haul.

EQUIPTMENT NEEDED:

Mixing bowl, measuring cup dry ingredients, liquid measuring cup, measuring spoons, whisk or hand mixer, rubber scraper, large spoon or muffin scoop, zester, muffin pan and paper liners(optional but recommended) Oven is required

INGREDIENTS:

1/2 (1 stick) melted butter and cooled(I pop it in the fridge while I get everything else together)

2 large eggs

1/2 cup whole milk (or whatever you use for cereal)

1 lemon, zested

2/3 cup granulated sugar

1 cup AP flour + 1 cup wheat flour (optional) you need 2 cups total flour

2 tsp baking powder

1 tsp salt

1 tsp ground cinnamon

2 TBS sanding sugar (granulated sugar is fine) for the tops of the muffins

****2 cups fresh blueberries (dusted with flour lightly to prevent them from sinking like the Titanic when baking)

****This is where you can add your own mix-in of choice. I mixed several options in a separate bowl 2 scoops at a time.

I used blackberries and blueberries and diced apple and diced apricot for my separate mix-ins to please my picky eaters. Such a tough crowd I have. Short order cooking is a tough gig for sure. And I tell myself every time that I'm not doing it anymore but here I go making 4 muffin flavors. But as you see, it's really not a big deal, or at least to me it's not.....anymore.....Well at any rate I cook and bake to please my crowd and that alone makes me happy. 

Ok back to the instructions....

Preheat your oven to 375 degree F. Line a standard muffin pan with paper liners or if not using spray liberally with non-stick baking spray. The last thing you want is the muffin stuck in the baking pan. Oh the HORROR of that!!!!!

In a medium mixing bowl, combine the two eggs, milk of choice, cooled butter and sugar, and lemon zest. Mix to combine well about 3 minutes. Either hand or hand mixer is fine. I used a wire whisk cause I just didn't want to dig my mixer out.

Add you flour(s), baking powder, cinnamon and salt to the liquid mixture and mix until combined. Batter will be slightly thick and dense. Add your mix-ins now and gently fold into the batter. Oh NUTS, yes you can add nuts too. Chopped nuts are a great addition to muffins if your crowd likes them and you have them handy in your pantry. Go ahead, this is your muffin add what you like.

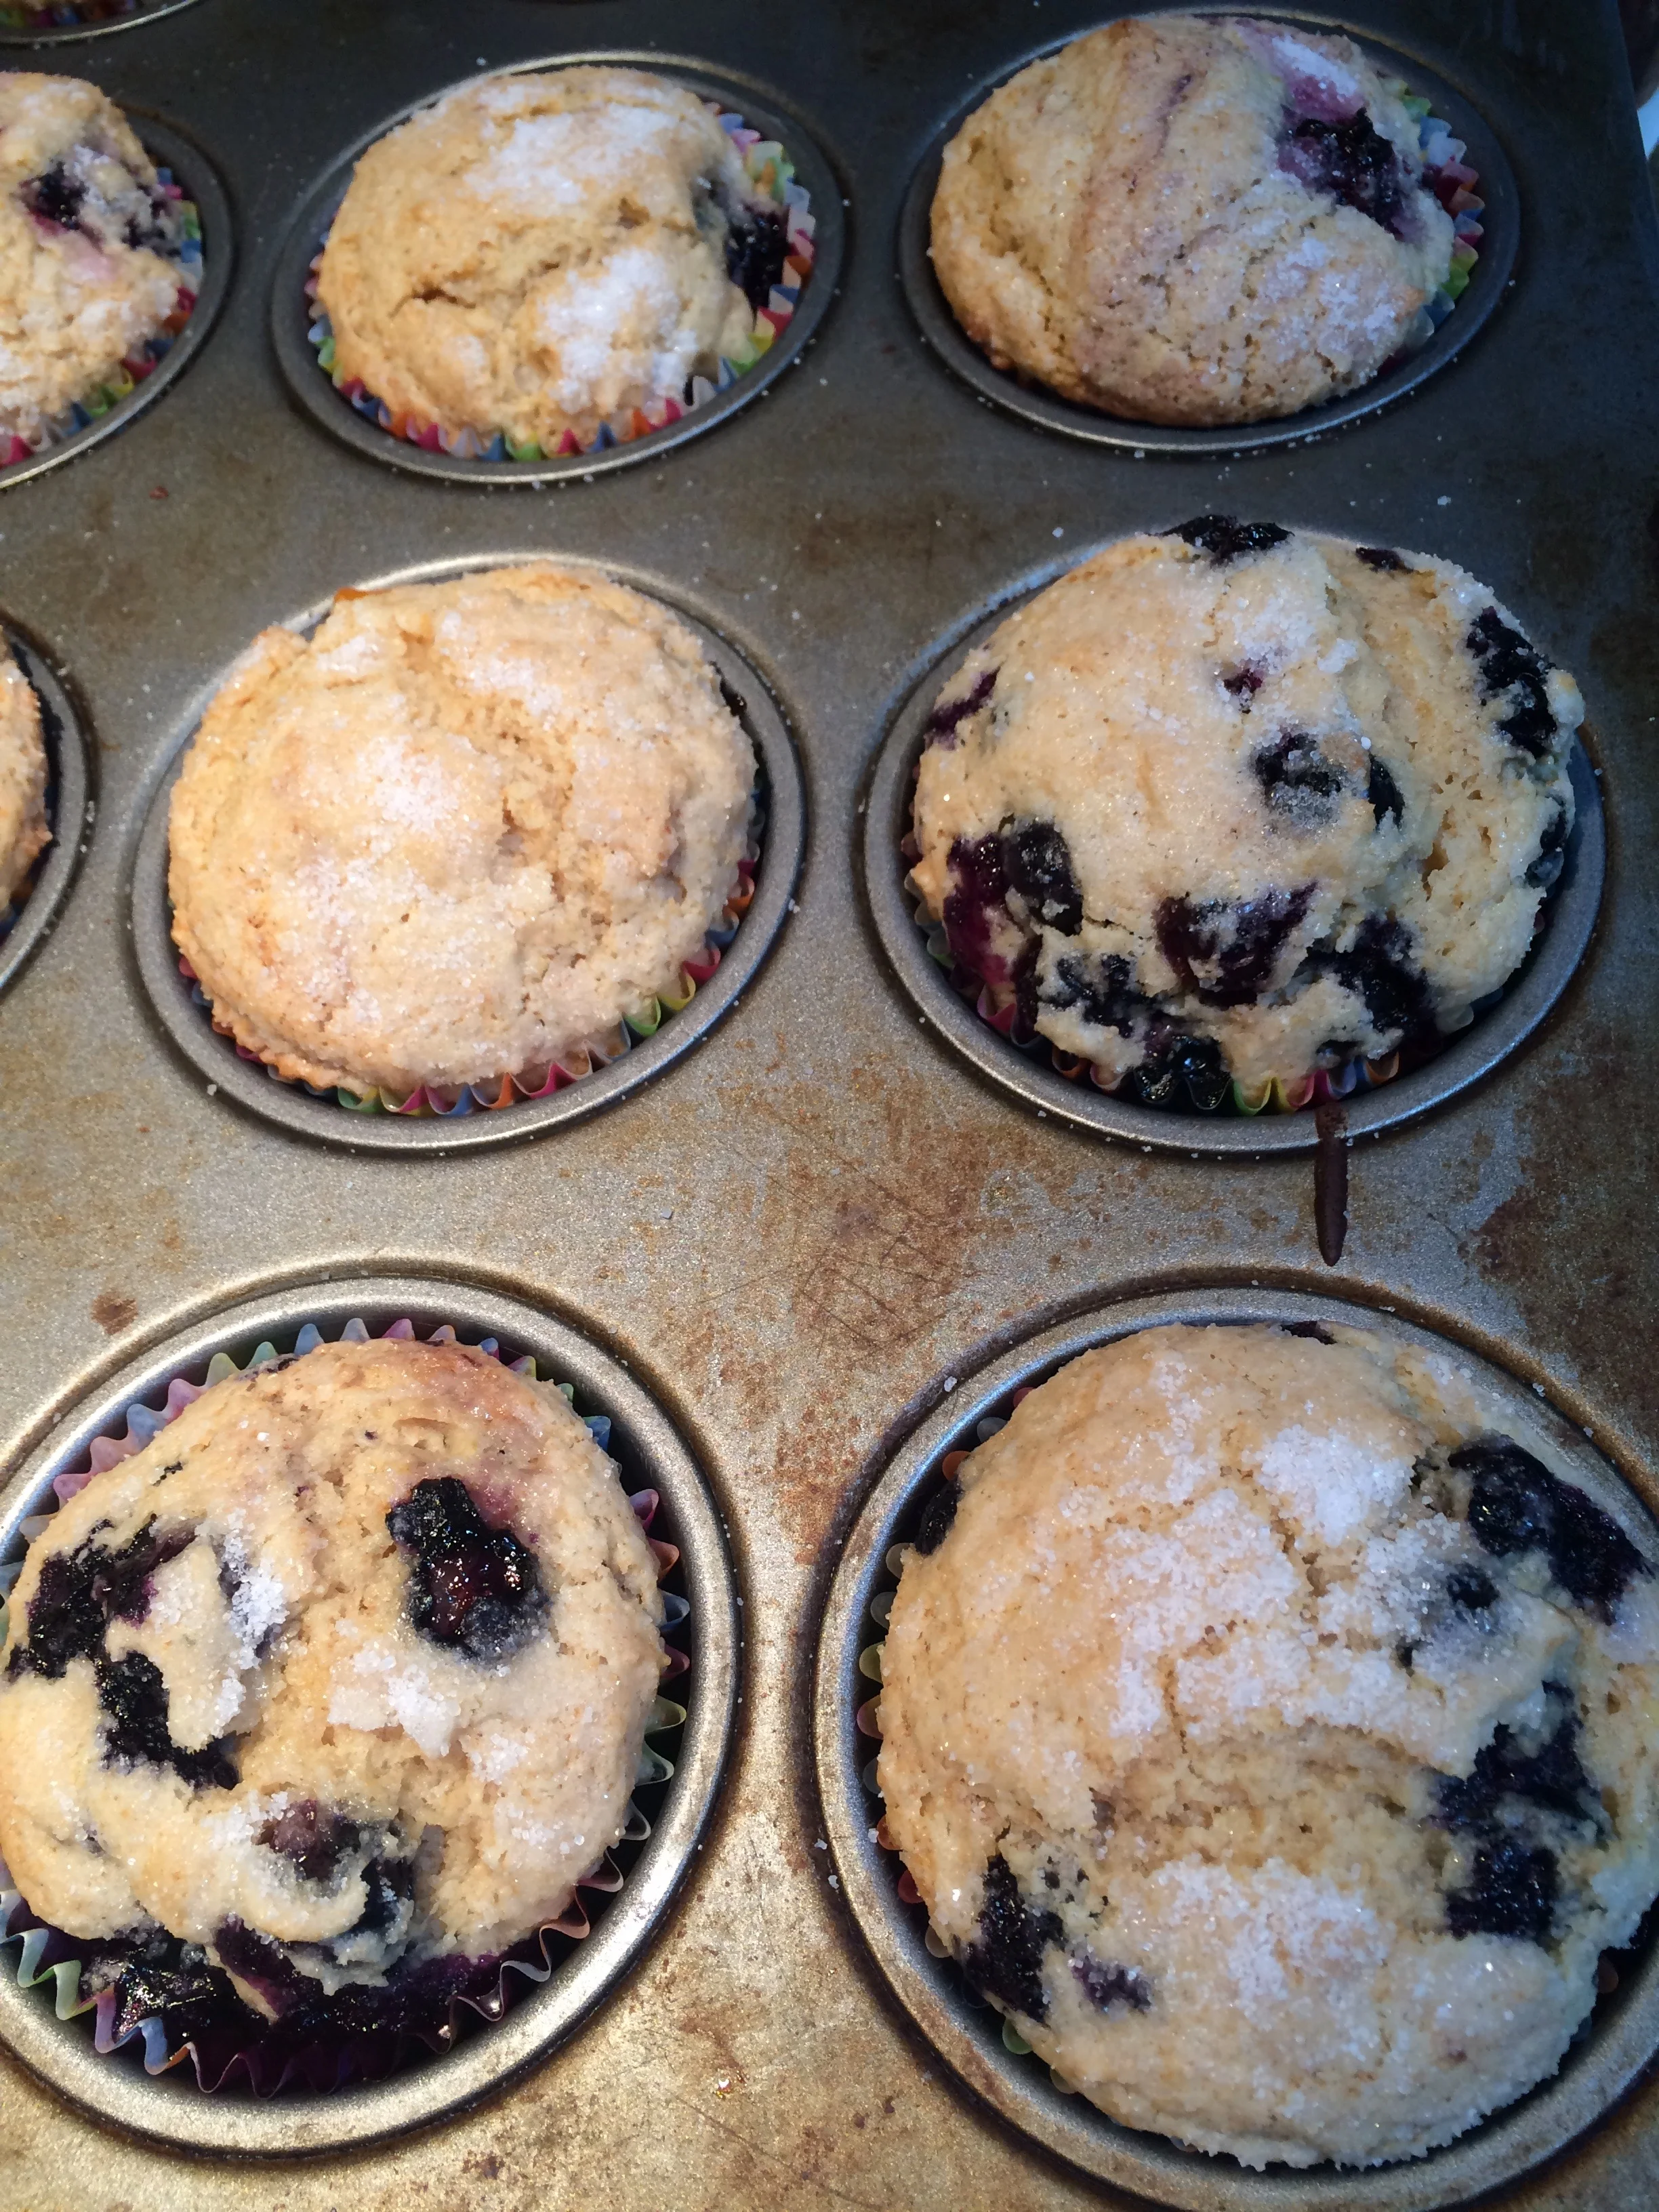
Scoop the batter into the prepared pan or liners filling them to the top or scant below about 1/4" Sprinkle the tops of each muffin with sanding sugar to create a glistening top and crunchy crust.

Bake 25 minutes or until a wooden skewer comes out clean when poked in the center of the muffin. Remove from the oven and enjoy! They are best cooled about 10 minutes but defiantly hard to wait when you've been smelling them bake.  Store in an airtight container or freeze for a breakfast on the go moment. 


Chicken Saltimbocca

This Tuscan chicken dish is moderately easy to pull together for a family meal or to impress your dinner guests in about 30 minutes start to finish. Feeds 6 people.

The Ingredients are as follows: Equipment needed: large skillet, spatula, baking sheet with rack

6 thin-sit boneless, skinless chicken cutlets. 

1/2 cup all-purpose flour

ground black pepper and salt

1 TBS. fresh sage leaves, minced

6 Slices of prosciutto

4 TBS olive oil

1 1/2 cup dry white wine or vermouth

2 tsp lemon juice squeezed

4 TBS cold unsalted butter cut into pieces (keep cold until ready to use)

1 TBS minced Italian parsley (leaves only)

salt to taste

1 Tsp Capers rinsed (optional)


Pat the cutlets dry with a paper towel (both sides) 

Mix flour with salt and pepper in a shallow baking dish (to dredge)

Dip each cutlet both sides in flour mixture and set aside.

Heat oven to 250 with rack in center position.

Press the minced sage into the top of each cutlet and place a slice of prosciutto on top. Press slightly to ensure it stays in place. A dab of water around the underside will help if needed.

Cook the chicken in 2 batches using 2 TBS per pan

Heat your skillet then add 2 TBS olive oil. Add 3 cutlets to the pan with the prosciutto side down first. Let it cook about 3 minutes or until golden brown. Flip and cook 2-3 minutes more until golden. Transfer these to the pan with the wire rack and place into your warm oven.

Add the remaining 2 TBS olive oil to pan and repeat the cooking method. Transfer these to the oven after cooking while you prepare the pan sauce.

Off the flame, add your wine to the pan then place over a medium heat and let reduce to about 1/2 cup (5 minutes) Stir in lemon juice and reduce heat to low. Add pieces of chilled butter little at a time and incorporate with a wire whisk until all is added. Turn off heat and add chopped Italian parsley and optional capers. Season with salt and pepper to taste. 

Remove the chicken from the oven and place in the pan sauce. Serve each cutlet with pan sauce served around the cutlet. I like to keep the prosciutto crisp, therefore I don't pour sauce over the top.

Serve with your favorite sides. I used wild rice and Italian flat beans.

This dish make a great entertainer because it can be made 30 minutes ahead and kept warm in the oven until serving.


Chicken Tinga Tacos

Smoky, slightly spicy and earthy chicken tinga takes less work than you thing and packs a powerful burst of flavor. Chipotles add the heat and the smoky while the other ingredients add layers of flavor. You adjust your heat level by removing the seeds inside the chipotle pepper too. You can always make it more spicy but once you go over your desired heat level, theres no going back so I like to make it mild and build from there by tasting along the way.

By browning the chicken first and then cooking them in the sauce produces a richer, deeper tinga flavor.


TINGA definition= A Mexican dish, origin Pueblo Mexico, made with shredded chicken in a sauce made of red and green tomatoes(tomatillos), chipotle chili peppers and onion strips served on a tortilla. 

INGREDIENTS

6 boneless, skinless chicken thighs or 4 boneless chicken breasts

1/2 diced white onion

2 garlic cloves smashed

1 large tomatillo chopped

1/2 tsp Mexican Oregano

1/2 tsp ground cumin

1 Can (14.5 oz.) diced tomatoes

2  chipotle peppers diced (seeds removed for less heat) plus 2 TBS adobo sauce from the can

1/2 cup chicken stock

1 bay leaf 

Salt to taste

In a Dutch Oven or heavy bottom pan, heat 1-2 TBS canola oil

Pat chicken dry and place in hot pan to brown about 6 minutes each side.

Remove from pan and transfer to plate leaving fat in pan

Add onions and garlic, cook to translucent. Add tomatillo and cook to soften.

Add oregano and cumin, tomatoes, chipotle with adobo and cook about 5 minutes on medium heat stirring occasionally to not burn.

Transfer sauce to blender and puree to smooth, adding the chicken broth as needed to thin.

Pour sauce back into pan and stir in remaining chicken stock and add bay leaf

Chop chicken in to strips and add into sauce along with any natural juices that may have settled on the plate.

Stir to combine and bring to boil over medium heat. 

Reduce to a simmer and let cook uncovered about 5 minutes

Season with salt to taste.

Spoon chicken into warm corn tortilla and top with salsa, onion, cilantro and cotija cheese

Serve with lime wedge(to help cut the heat) and radish and perhaps a side of black beans.

A cool brew or margarita and you're all set!

Defiantly not your ordinary taco. 

Enjoy!


IMG_5766.jpg

Jalepeño Popper Burger

It's football season both pro and college and that means tailgates and grilling. When you want to step up your game and wow your crowd, look to the burger.  Not an ordinary burger. You will need to impress with this jalepeño popper inspired burger. Two patties with a cream cheese, cheddar, jalepeño filling in the middle that yields a gooey and creamy burst of flavor.  These can be made in slider size or regular burger size depending on your serving needs. I guarantee your guests will definitely be asking for these again.  I hope you enjoy these.

Ingredients for 2 burgers:

3/4 to 1 lb ground sirloin
2 Tbs softened cream cheese
1 Tbs diced pickled jalepeños (nacho style)
1 Tbs diced red onion
1/4 cup grated sharp cheddar cheese (orange or white)
Salt and Pepper
Your favorite bakery buns
Romaine lettuce
Tomato
Red Onion

Cream cheese mixture before adding the grated cheese

Cream cheese mixture before adding the grated cheese

After adding grated cheese

After adding grated cheese

Sriracha Sauce:
1 Tbs mayonaise or greek yogurt
A few dashes of sriracha to your taste
small squeeze of lime

Heat your indoor or outdoor grill while you make the patties.

In a small bowl mix softened cream cheese, diced jalepeños, diced onion together.
Add the grated cheese and mix to combine.
Set aside.
Divide meat in 1/2 and then each half in 1/2 again so you have 4 balls of meat.
Flatten your base burger and make a indented center well to house the filling.
Flatten another burger for the top cover.
Fill each base burger (with the indent) with about 2 Tbs of filling.
Top and seal with the flat burger sealing the edges together pinching with your fingers.
Reshape and repeat with the other burger.
Season with salt and pepper

Make an indentation by flattening the center of the burger a bit thinner than the rest to house the filling

Make an indentation by flattening the center of the burger a bit thinner than the rest to house the filling

Fill each patty with the jalepeño filling and top with the remaining patty.

Fill each patty with the jalepeño filling and top with the remaining patty.

Seal the edges and reshape the burger. Sprinkle with salt and pepper before putting on the grill

Seal the edges and reshape the burger. Sprinkle with salt and pepper before putting on the grill

And here is your finished grilled burger. Place some sriracha sauce on the bottom bun then add lettuce, burger, choice of toppings and more sauce on the top bun to hold. Cut it 1/2 for serving. The center will be a creamy, cheesy and spicy burst of …

And here is your finished grilled burger. Place some sriracha sauce on the bottom bun then add lettuce, burger, choice of toppings and more sauce on the top bun to hold. Cut it 1/2 for serving. The center will be a creamy, cheesy and spicy burst of flavor.

Mamacita's Chili

The perfect cool-weather dish to feed a crowd for Sunday football, this chili can be tailored for just the right amount of heat.  Like all of my original recipes, this one is rustic and fool-proof but delivers a punch of rich flavor.  I love to use Carroll Shelby's Chili Kit as a base but you can certainly use your own spice blend.  Simply taste along the way and adjust the spice and salt to your liking; this one is all about the full-bodied flavor profile.

Ingredients:

1-2 lbs top loin steak, cubed
1 medium yellow onion, diced
2 cloves garlic, diced
Salt and pepper
2 tbsp Masa flour from Carroll Shelby Chili Kit or all-purpose flour
2 tbsp olive oil
1 bottle of beer, IPA or ale
1 can (28oz) whole tomatoes or tomato purée
1 can (15oz) Rotel diced tomatoes & green chilies
Carroll Shelby's chili seasoning (I use 1/2 bag seasoning only)
1/2 tsp cumin
1 tsp chipotle powder
2 cans (15oz) kidney beans, drained & rinsed
1 can (15oz) black beans, drained & rinsed
1 can (15oz) pinto beans, drained & rinsed
Frozen roasted corn, 1/2 bag. I prefer Trader Joe’s.
Optional: frozen bell pepper/onion mix, 1/2 bag.  I prefer Trade Joe’s.

Garnishes:

Scallions
Cilantro
Sour cream
Grated cheese of your choice or queso fresco
Tortilla chips

Cooking Instructions:

Season the cubed meat with salt and pepper then dust with the masa or flour and toss to coat. Set aside. Drain and rinse all of the beans and set aside. Heat a 6qt pot on medium for about 1 minute, add olive oil, and sauté garlic and onion for 2 minutes until translucent.

Add cubed, seasoned, and floured meat to the pot. Let the meat cook for about 1 minute before stirring. Cook about 2 more minutes before stirring again to develop a good crust on the meat and leave little bits on the bottom of the pot.

Deglazing the pan. Look at that flavor just waiting to be released.

Deglazing the pan. Look at that flavor just waiting to be released.

These bits = flavor gold.  Add the beer to the pot to deglaze, scraping those bits from the bottom of the pan as you stir.

Add your tomatoes, Rotel, seasonings, and stir. Add in beans, corn, and the pepper/onion mix if you're using those. Stir, cover, and walk away.  Simmer for 25 minutes. Serve in bowls and top with your choice of garnish.


Nonna & Papa's Sausage Stew

IMG_7548.JPG

I'm an Italian who learned to cook from an Italian and as we all know generational Italian recipes are a little of this and a handful of that. This Italian rustica style of cooking has always meant, it will turn out just fine, no matter what, to my extended family.

This is one of those dishes.   You'll be pleasantly surprised how much flavor the sausage brings to the sauce as it finishes.  

As a child, I remember smashing the potatoes in my bowl to thicken the sauce and dipping my Nonna's homemade bread into it. My daughter commented while we were cooking this dish that our house smelled just like Ma's (my Moms) house.  One of the best compliments I could ever get.

Garlic, tomato sauce, basil, olive oil I hope your family enjoys it as much as mine does.

Ingredients:

2lbs hot or mild italian sausage (I use a package of each)

3 cups water

2 tbsp olive oil

4 medium russet potatoes, peeled & cut into chunks

2 - 3 carrots, cut into chunks

2 - 3 celery stalks, cut into chunks

2 zucchini (optional), halved and sliced

1 whole yellow onion, coarsely chopped

3 cloves garlic, smashed and left whole

2 cans of your favorite tomato purée or crushed tomatoes

2 tsp dried oregano or Italian seasoning blend

Salt and pepper to taste (tomatoes need salt so don't be surprised if you use 1+ tsp, but taste as you go)

1/2 tsp red pepper flakes (optional) for added heat

Fresh basil leaves, chopped

Parmesan cheese, shaved

Italian parsley, chopped

Crusty bread


Cooking Instructions:

In a saucepan, add the sausage with 2 cups (or more as needed) water and bring to a boil; boil 5-7 minutes to remove some of the excess oils. Remove, cut into chunks, and set aside. It's alright if they are not fully cooked as they will cook in the sauce later.

While the sausage is cooking, heat a Dutch oven over medium heat, add olive oil, and sauté onion and garlic together. Cook just until they start to get tender and watch to not burn your garlic.

Add carrots and potatoes. Sauté together 5-7 minutes, stirring occasionally. Season lightly with salt and pepper.

Add tomato purée, remaining 1 cup water, sausage, celery, oregano, basil and optional pepper flakes.

Bring to a boil and cover, then down to a medium simmer for 1 hour or until potatoes are fork tender. Taste and season with more salt & pepper as needed.  If adding zucchini, put it in at the 50 minute mark; it cooks quickly and nobody likes mushy zucchini.

Ladle portions into in soup bowls, then top with shaved parmesan, chopped parsley, a drizzle of olive oil, and add a slice of crusty bread.

A full bodied Tuscan red or Chianti will balance out the acid of the tomato sauce nicely.

Mangia!

Serves 6-8

Where It All Began

Assorted crostini: Gorgonzola fig with balsamic glaze, Raspberry brie, & Lemon zest ricotta with pear, glazed walnut, and honey drizzle.

Assorted crostini: Gorgonzola fig with balsamic glaze, Raspberry brie, & Lemon zest ricotta with pear, glazed walnut, and honey drizzle.

Behind Kitchenwise™, there is a mom with three girls who love to help in the kitchen. I’m Laura Ivy, wife, mother, retail merchandiser, food enthusiast, and founder of Kitchenwise.  For my family, being in the kitchen together is an everyday occurrence.  I grew up in a big Italian family where cooking and helping out in the kitchen was a way of life. Sometimes we had several generations in there at once, passing on those all-important traditions and old world techniques; fresh food, seasonal ingredients (most grown in our garden) and everything bursting with flavor.

In keeping with the fresh-from-scratch traditions that I learned from my own mother and grandparents, I spend a lot of time in the kitchen with my girls talking about how food should be fresh, clean, healthy, and above all made with passion.  Who would have known that all these years later, these principles would apply to my new brand?

Kitchenwise was born with a mission to find the perfect balance in design, safety, and cleanliness; smart products that look good and work even better.  For me, preparing a great meal starts with fresh ingredients, a clear vision (even when I’m just winging it), and a clean kitchen. 

Chopping the last of the salad veggies while the steak rests.

Chopping the last of the salad veggies while the steak rests.

When my daughters were little and I was making something in the kitchen they were always eager to help, especially if beaters were involved, of course. Pulling up their little step stools to see over the countertop with their aprons on, they were ready to dive in.  Like most kids, my girls wanted to mimic what they saw me doing in the kitchen.  As they have gotten older, I have started letting them help with more tasks, under close supervision, of course. 

Safety is always on my mind when we’re in the kitchen together.  We all know that most household accidents happen in the kitchen; cuts and burns send plenty of folks to the dreaded ER every day.  While a hot pan on the stove is certainly a concern for me, it’s our kitchen knives that have always caused me the most worry, but not for the reason you might think. 

I’m a clean-as-you-go cook, so there is always a sink of hot, soapy water waiting while we are prepping a meal.  It just makes the cleanup at the end of a meal seem a bit less daunting.  My girls have picked up on this as well, but letting them wash our knives by hand is just not something I am comfortable with.  As soon as they head for the sink, I find myself trying to quickly remove any sharp knives that I tossed in there.  It’s like putting my hand into a bowl of piranhas while trying to not get bitten.

Ideally, knives should be hand washed, dried, and put way as soon as you are done with them; not letting them sit on the counter to get crusty, no extended soaks in the sink, and definitely no trips through the dishwasher. But there was no way I was going to let even my oldest just grab a basic sponge and go to town on our knives. 

My daughters’ eagerness to dive into a sink of dirty dishes really got me thinking that there had to be a safer way to clean the sharp stuff; something that I felt comfortable letting them use without having to watch their every move.  Something better than a folded sponge, but short of a cut-proof butcher’s glove.  So I looked in stores and online, and came up empty.  After reading endless blog posts and articles, I found that most people would rather compromise their knives by putting them in the dishwasher than risk getting cut by hand washing them. 

When I couldn’t find anything that would fit my needs, I decided to get creative.  I tested a few concepts in my own kitchen with my girls and we really felt like we were on to something.  With a basic concept and crude prototype in hand, I reached out to some friends at Silicon Valley design firm WAGIC.  Working together, we designed and created Skrub™, the first product to be launched under the Kitchenwise brand.  

Skrub is a product that takes some of the scary stuff out of washing knives.  It’s got a cut-proof frame, is comfortable for hands both big and small, and has all the scrubbing power you will need.  Check it out on Kickstarter: Skrub Cleaning System