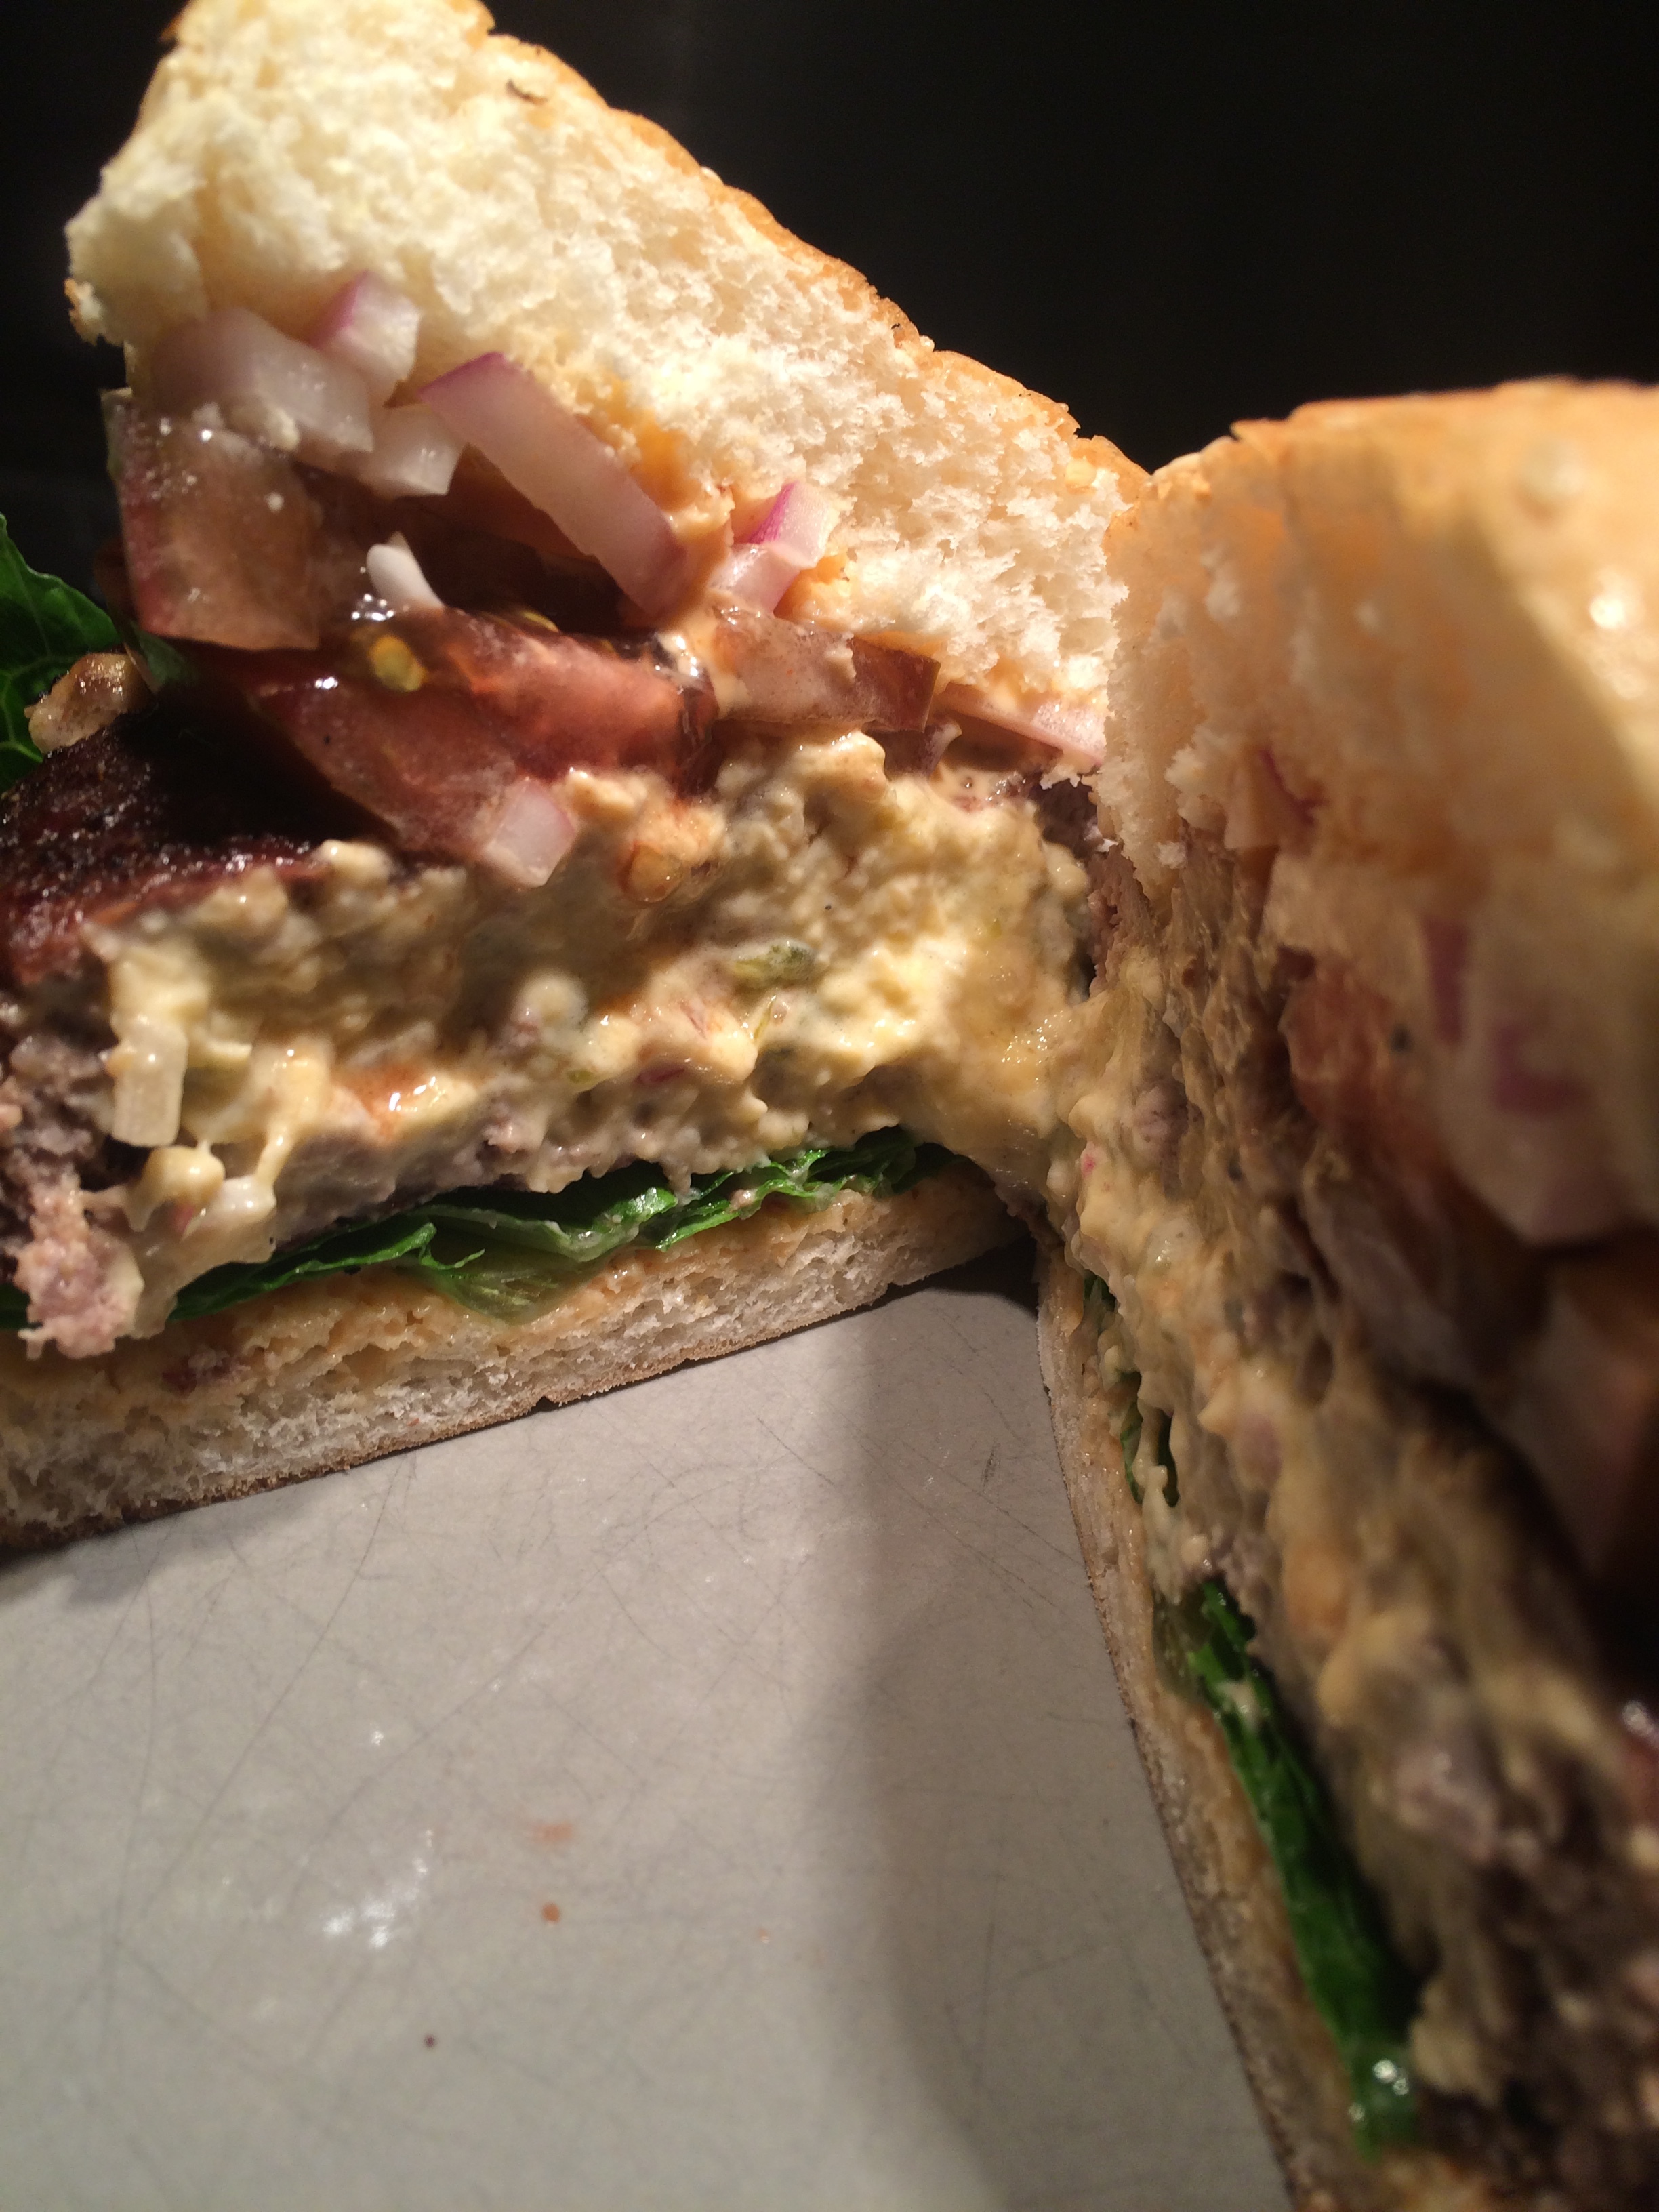
It's football season both pro and college and that means tailgates and grilling. When you want to step up your game and wow your crowd, look to the burger. Not an ordinary burger. You will need to impress with this jalepeño popper inspired burger. Two patties with a cream cheese, cheddar, jalepeño filling in the middle that yields a gooey and creamy burst of flavor. These can be made in slider size or regular burger size depending on your serving needs. I guarantee your guests will definitely be asking for these again. I hope you enjoy these.
Ingredients for 2 burgers:
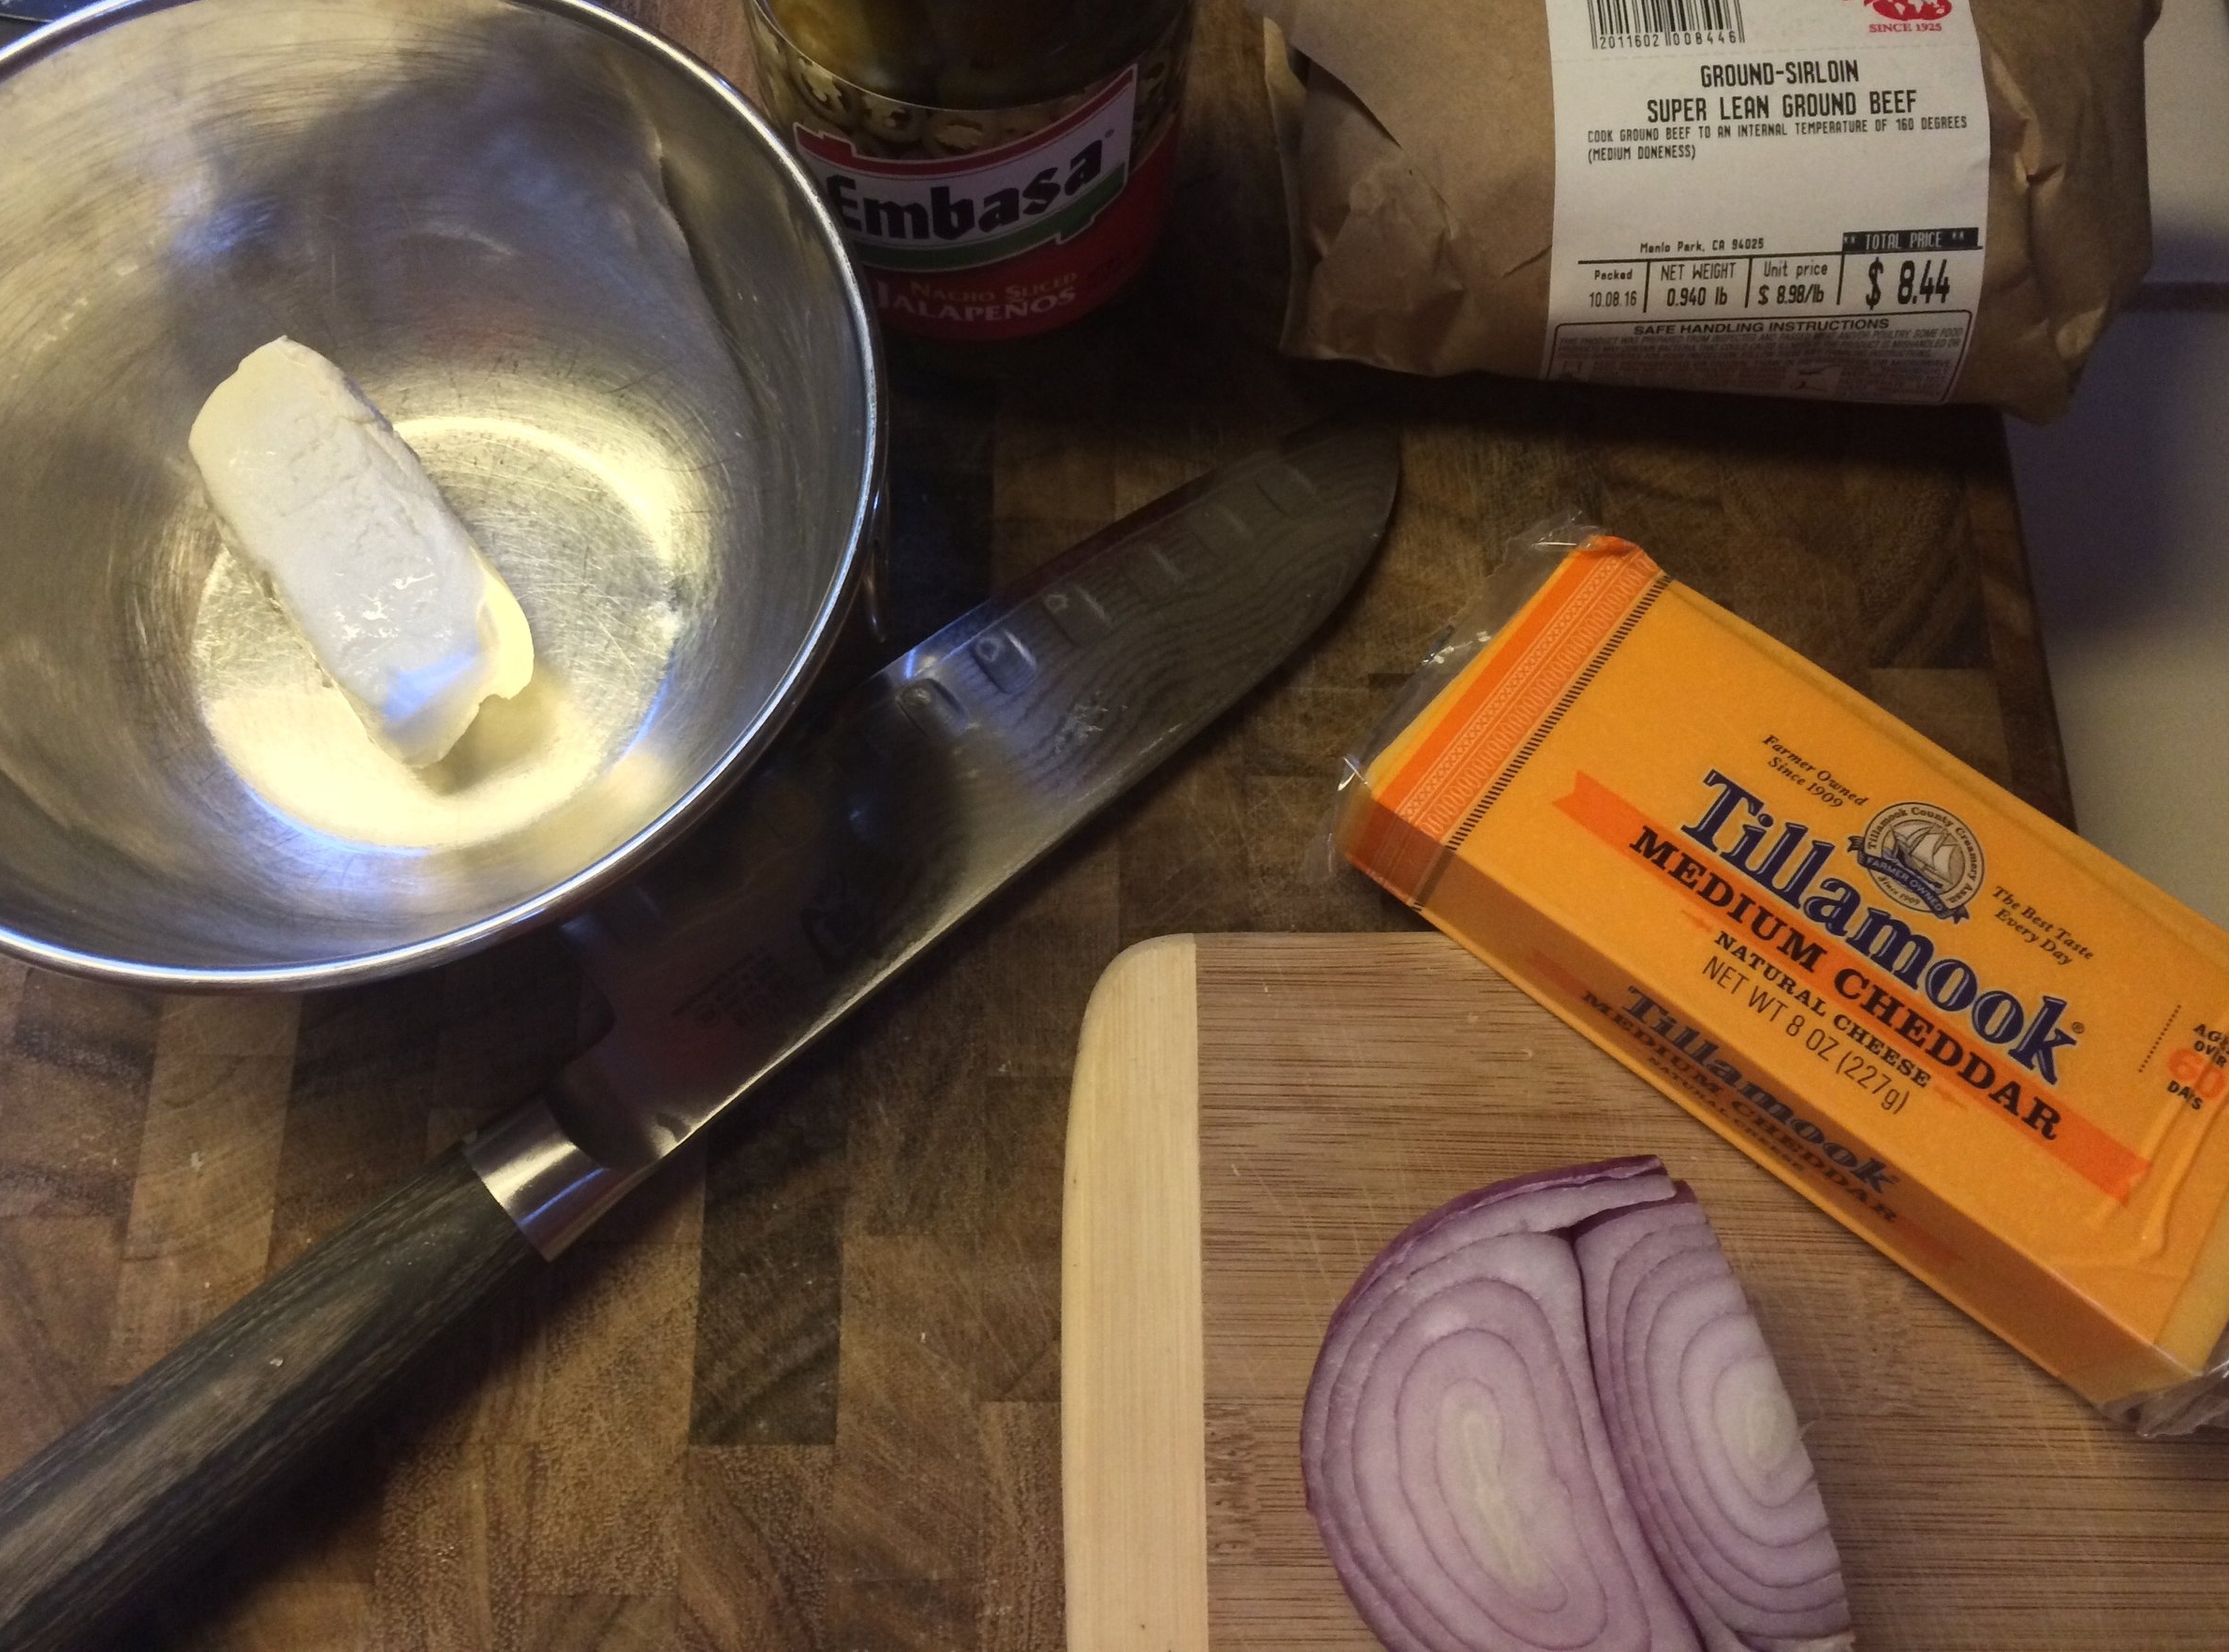
3/4 to 1 lb ground sirloin
2 Tbs softened cream cheese
1 Tbs diced pickled jalepeños (nacho style)
1 Tbs diced red onion
1/4 cup grated sharp cheddar cheese (orange or white)
Salt and Pepper
Your favorite bakery buns
Romaine lettuce
Tomato
Red Onion
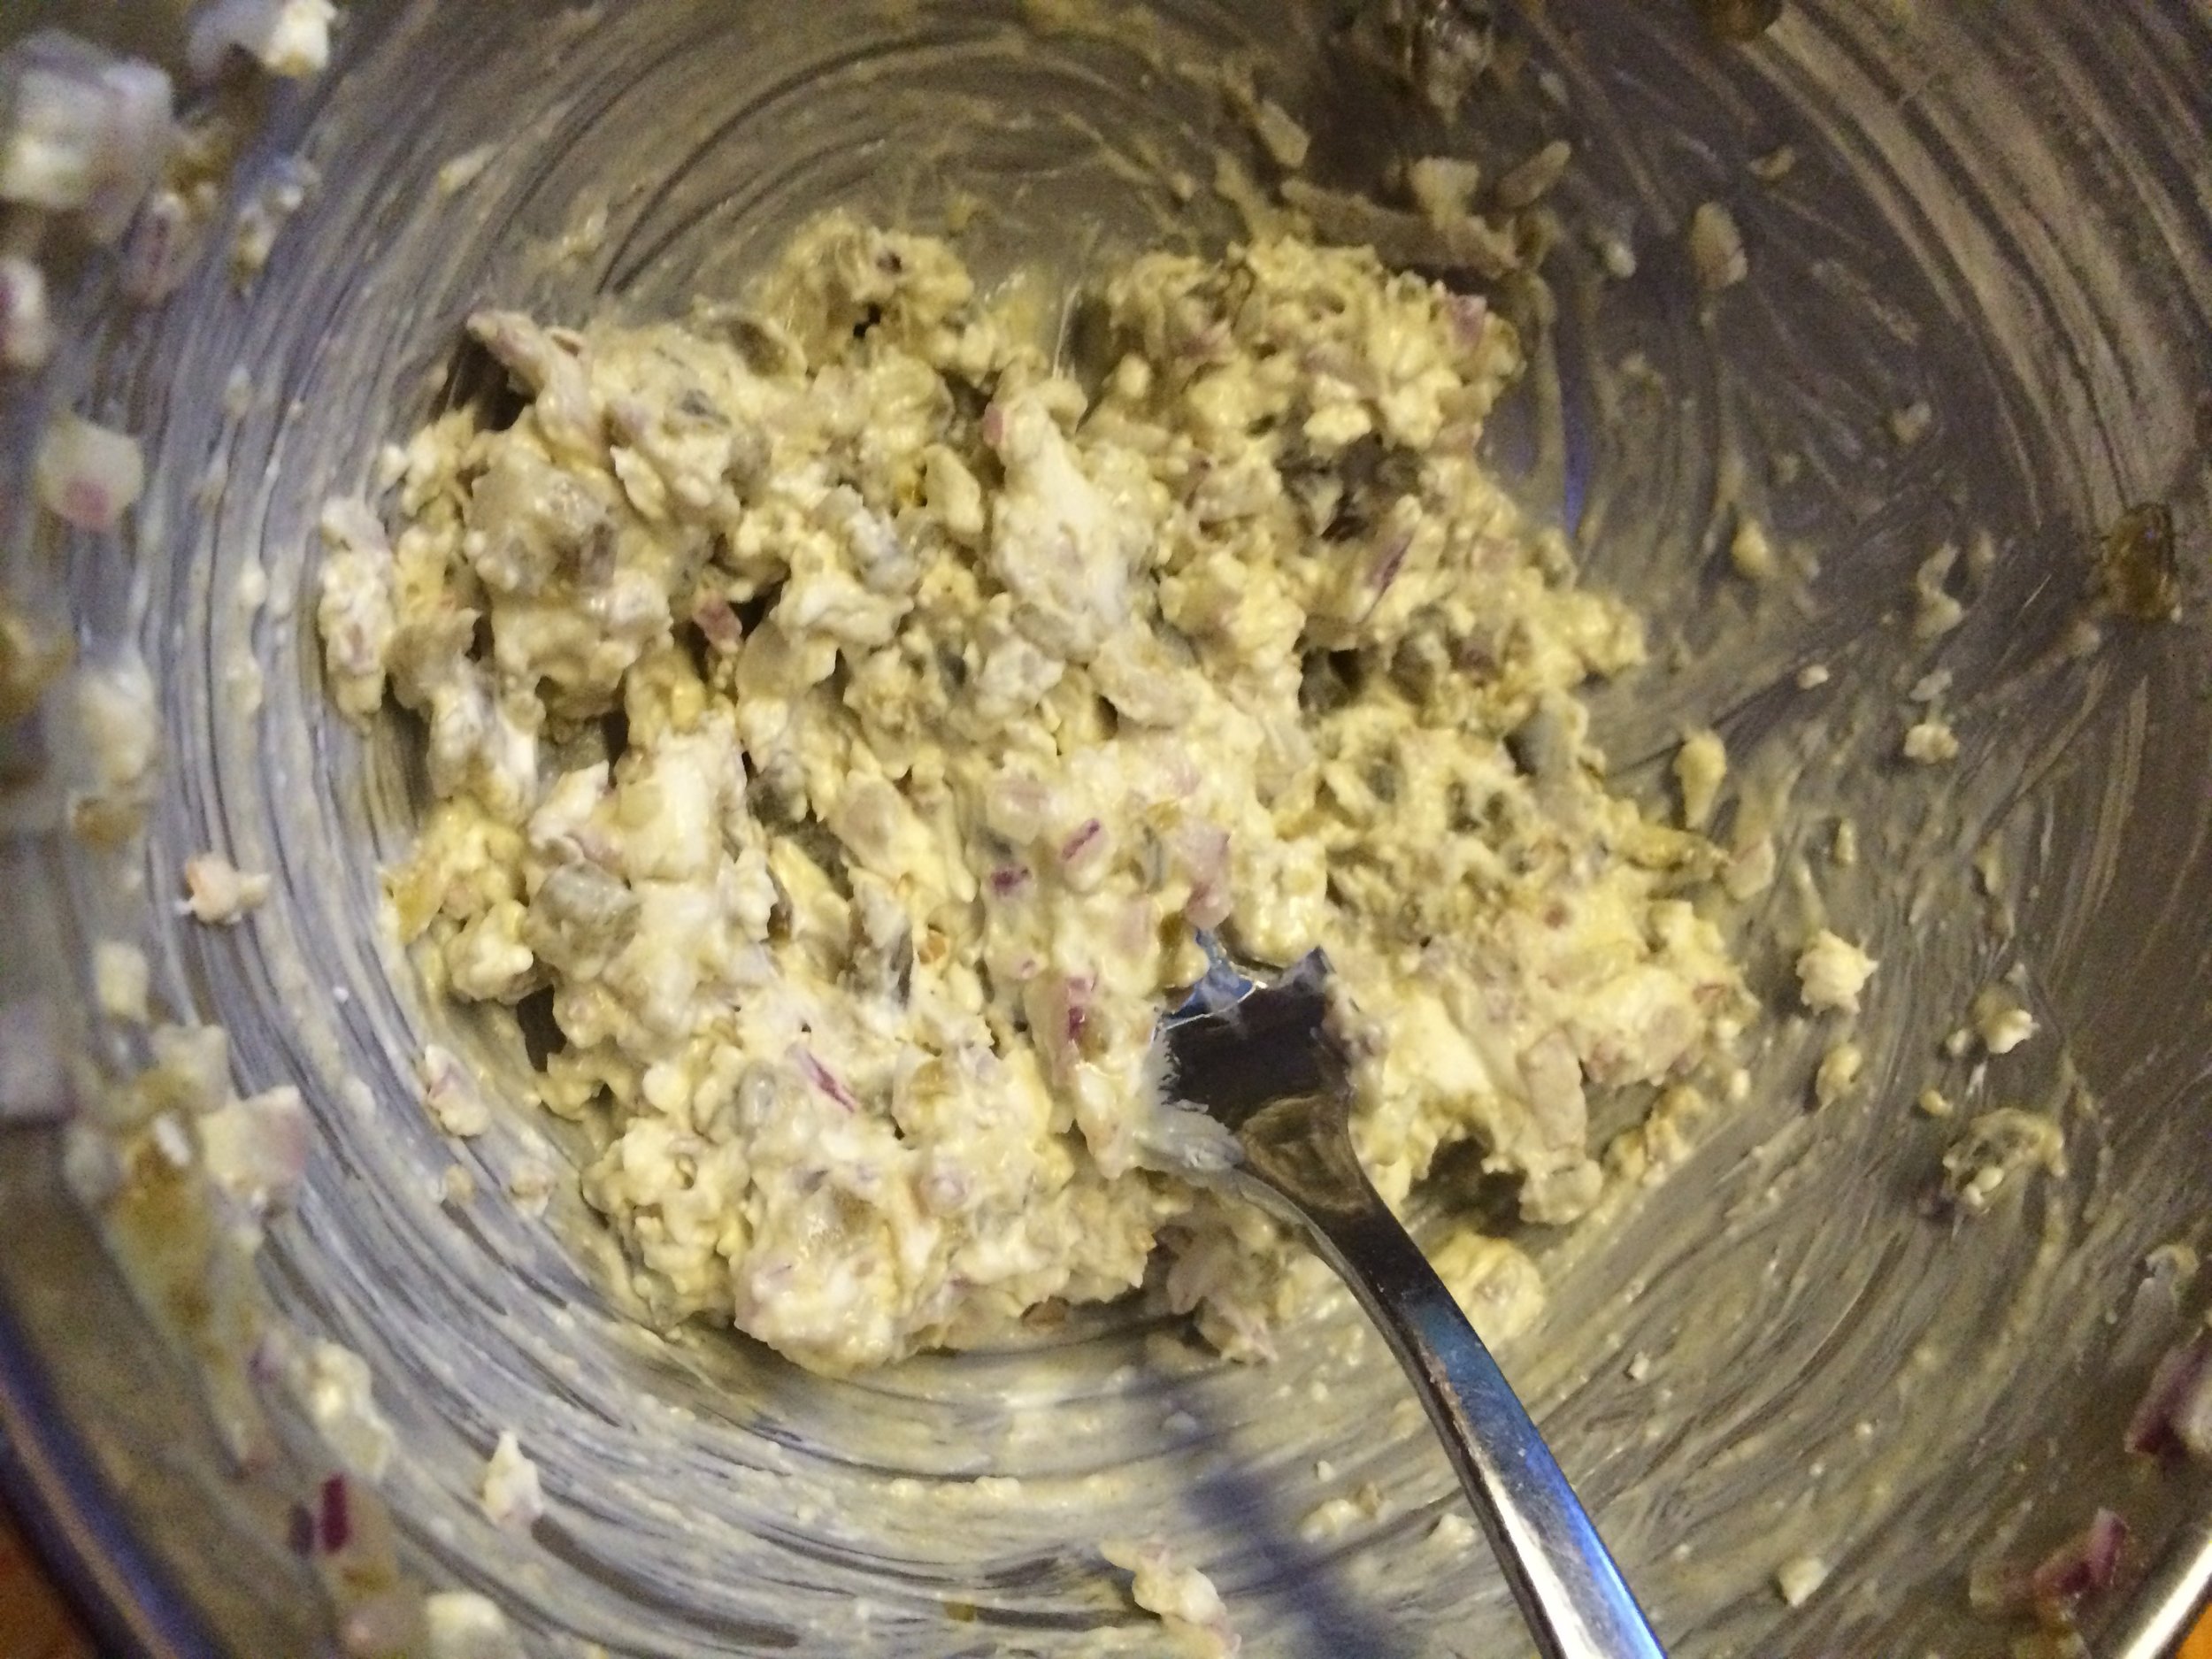
Cream cheese mixture before adding the grated cheese


After adding grated cheese
Sriracha Sauce:
1 Tbs mayonaise or greek yogurt
A few dashes of sriracha to your taste
small squeeze of lime
Heat your indoor or outdoor grill while you make the patties.
In a small bowl mix softened cream cheese, diced jalepeños, diced onion together.
Add the grated cheese and mix to combine.
Set aside.
Divide meat in 1/2 and then each half in 1/2 again so you have 4 balls of meat.
Flatten your base burger and make a indented center well to house the filling.
Flatten another burger for the top cover.
Fill each base burger (with the indent) with about 2 Tbs of filling.
Top and seal with the flat burger sealing the edges together pinching with your fingers.
Reshape and repeat with the other burger.
Season with salt and pepper

Make an indentation by flattening the center of the burger a bit thinner than the rest to house the filling

Fill each patty with the jalepeño filling and top with the remaining patty.

Seal the edges and reshape the burger. Sprinkle with salt and pepper before putting on the grill

And here is your finished grilled burger. Place some sriracha sauce on the bottom bun then add lettuce, burger, choice of toppings and more sauce on the top bun to hold. Cut it 1/2 for serving. The center will be a creamy, cheesy and spicy burst of flavor.